
Wardrobe Wants: Bershka

- I don't know where I'd be going in this, but I love this faux fur coat!
- These long pearl bead earrings are a minimalist's dream. These would be so cute with a super sleek low pony tail!
- A cool take on the classic striped shirt.
- I love that they transformed a basic sweater into something super cool - I'm digging this pink faux fur sleeve sweater.
- I've been really into sweatshirts lately, and this yellow sweatshirt is extra cool with the balloon sleeves.
- You all probably know this by now, but I love a good black dress.
- These side snap pants are a cool take on tracksuit pants.
- A pair of red boots have been on my hot list all year long!
- A cool printed t-shirt goes perfectly with a pair of jeans and a leather jacket.
- I have no idea what this green sweatshirt says, but it's dreamy.
- So, this is totally not in season right now, but it's always nice to have a striped dress on hand!
- Clearly I'm into the whole pink sweater vibe right now.
- Another trend in this wardrobe wants is my love for stripes. This striped top has a cool ring detail in the center front.
- This isn't a color combo I'd usually go for, but the model wearing this striped bodysuit sold me!
- I have yet to find a pair of wide leg pants that suit me, but these might be the ones!
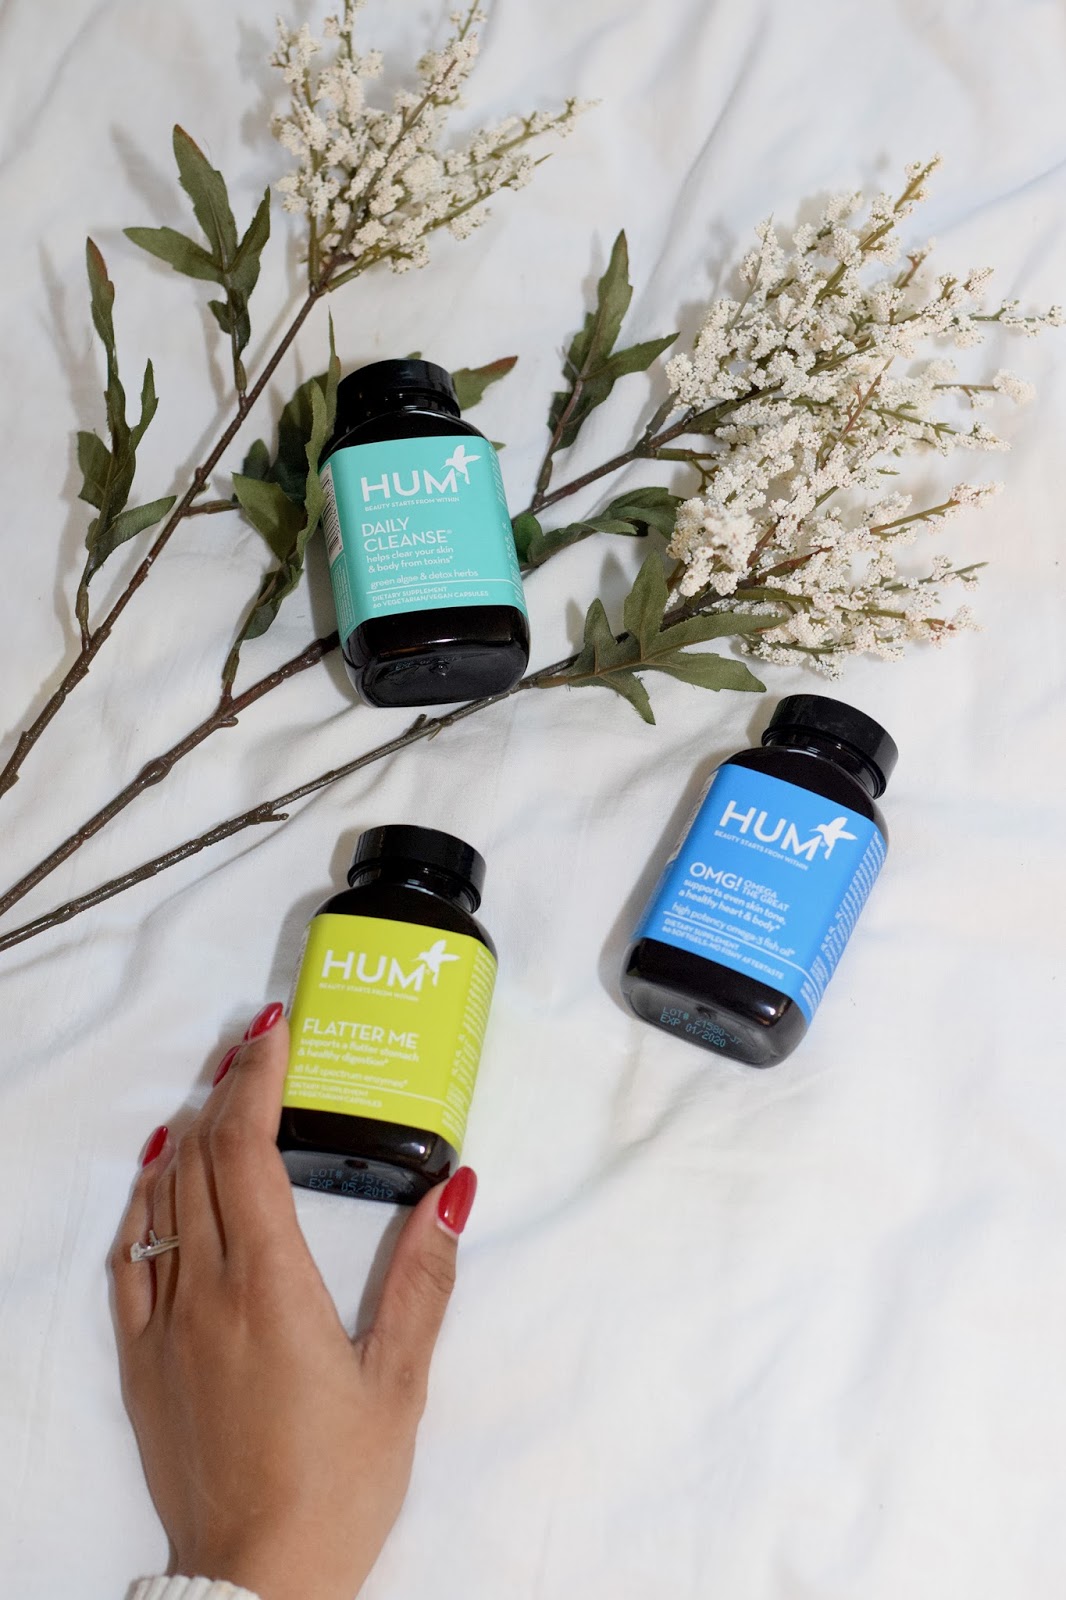
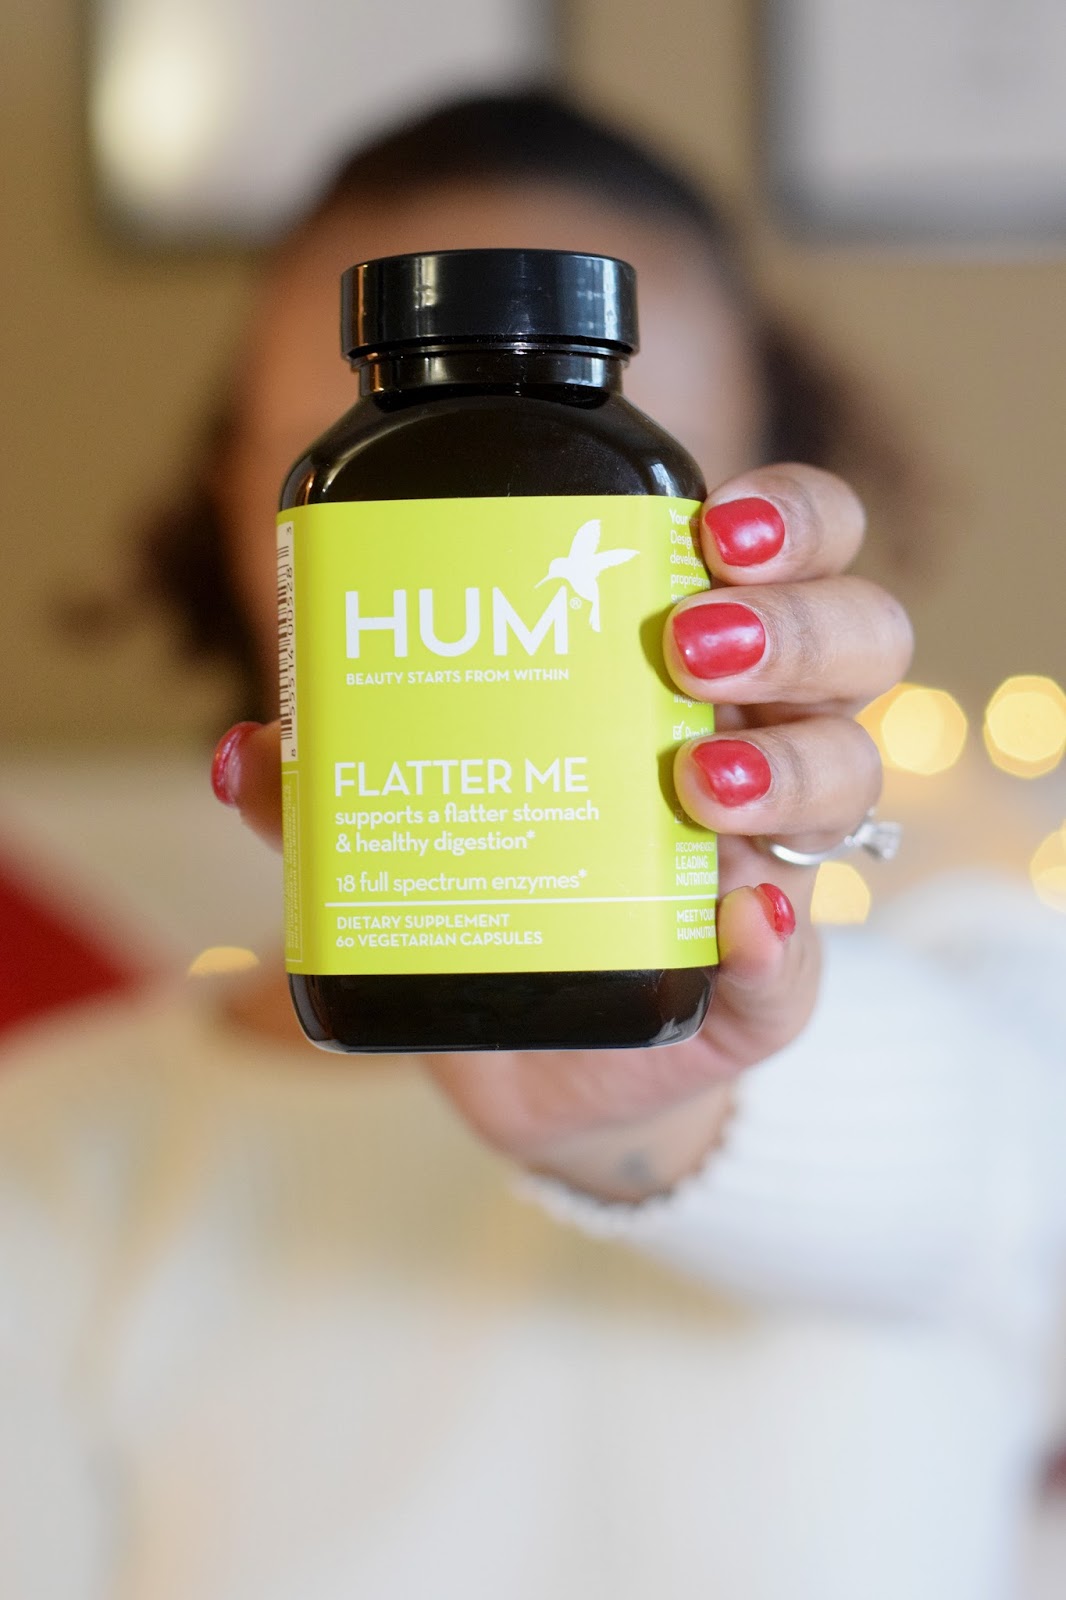
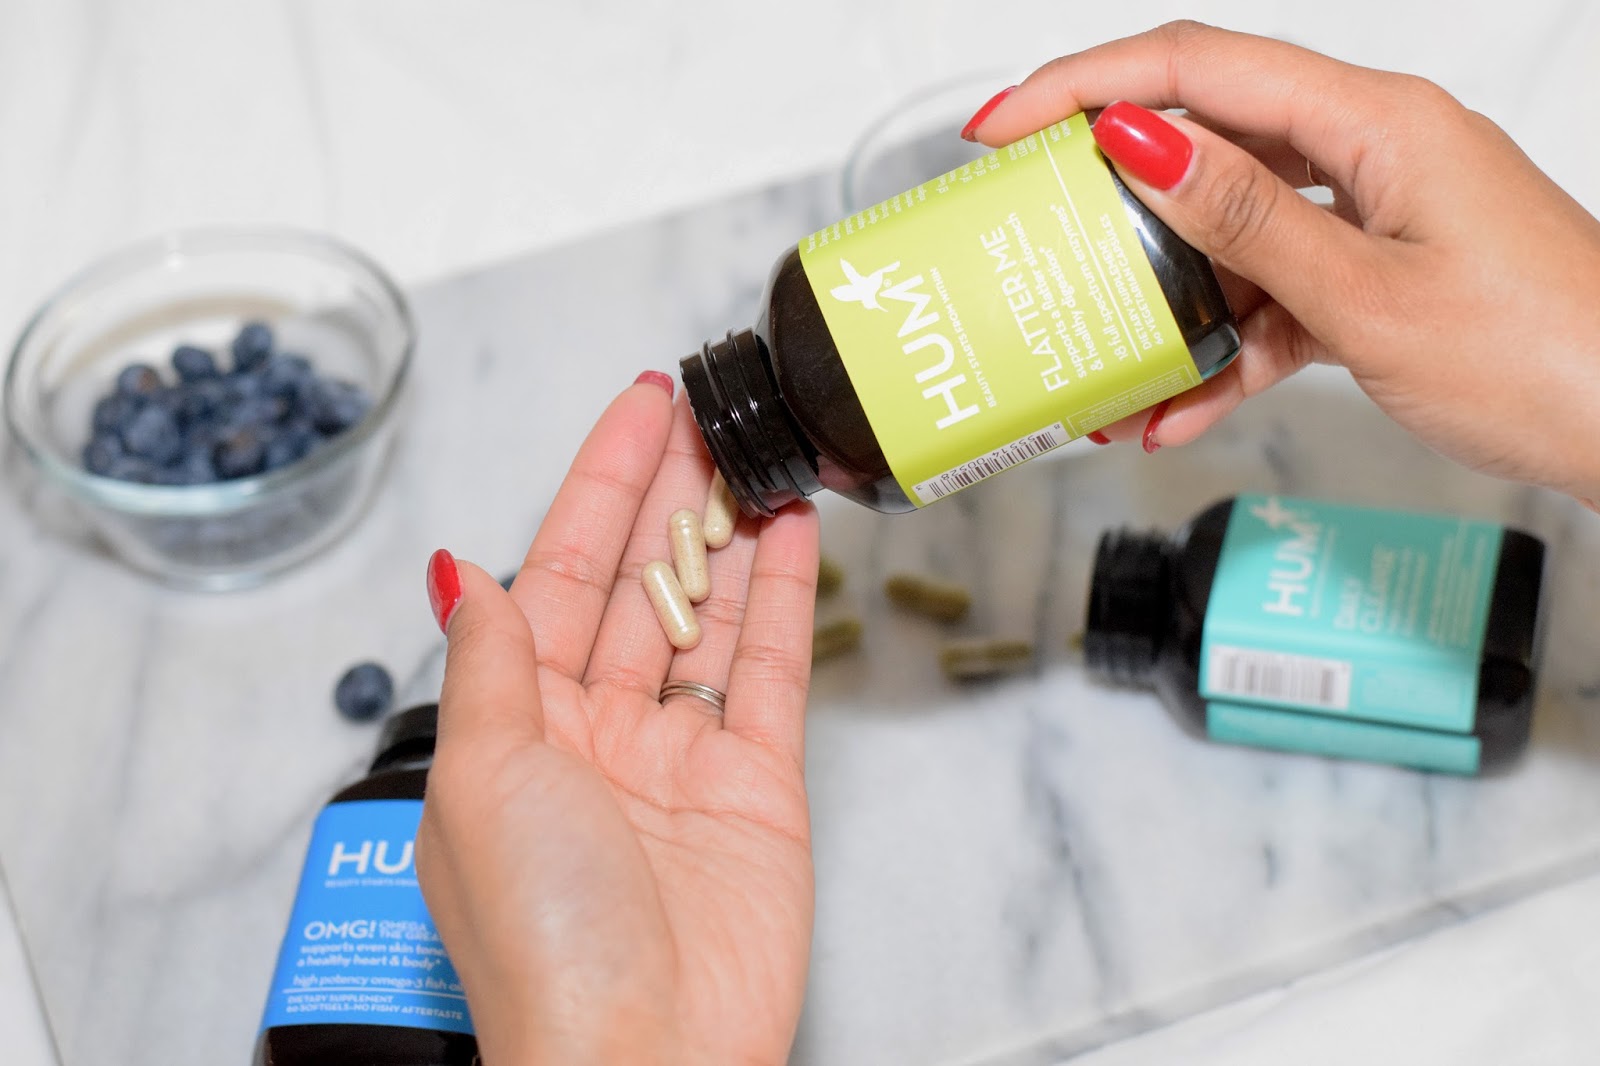
Road to a Healthier Me
Gift Guide for the Trendsetter

If you’re having a bit of trouble figuring out what to get your most stylish friend for the holidays, I’ve got you covered! These are my top 8 picks for the girl who is obsessed with fashion.
Holiday Gift Guide
- A TEDDY COAT is all the rage this season.
- A SILK SCARF is a super versatile accessory to jazz up any outfit.
- Statement shoes like these SILVER BOOTIES can really spice up a trendsetter’s wardrobe.
- On the days it’s not too cold, a PRINTED BERET is the perfect hat to rock.
- An updated EVERYDAY BAG is always an essential.
- Everyone needs a piece of jewelry to wear daily. My favorite is a NECKLACE. Your bestie will love this one!
- Everyone needs a knitted sweater in their closet. This SWEATER will definitely turn heads.
- The STATEMENT RED COAT is one of the hottest trends for IT girls this season. Your friend will appreciate this find!
x Alicia
This post is also featured on Popstar! I write for them every Friday, so be sure to check me out!
Winter Skin Challenge | #AD


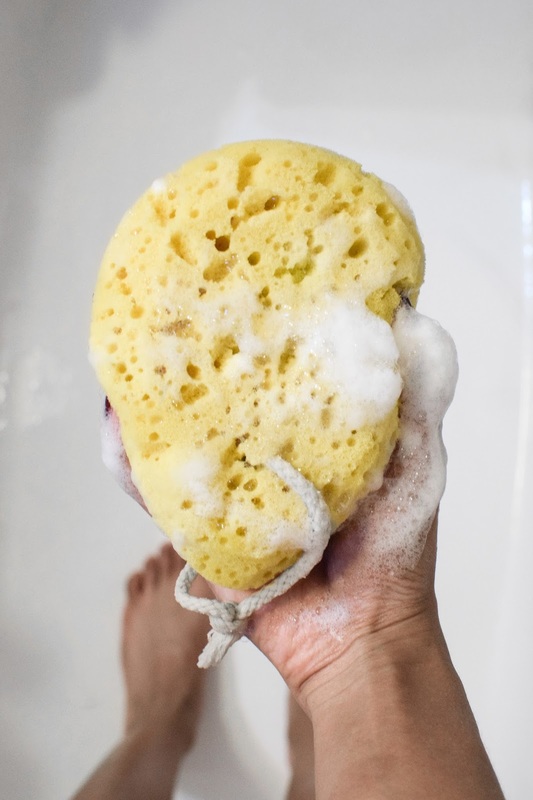

If you've got dry winter skin, this one is for you. Today I'm teaming up with Olay to share the #WinterSkinChallenge! This challenge is all about keeping your skin hydrated and moisturized during the cold winter months with Olay Moisture Ribbons Plus body wash. After just one use of this body wash, you'll find that your skin is softer and more moisturized!
I've found that the key to maintaining moisturized skin is to start in the shower. Let's be honest - sometimes you're in a rush and don't have time to apply moisturizer after your shower (or you're like me and can just be too lazy to!). With Olay Moisture Ribbons Plus, you'll be able to hydrate your skin without even giving it a second thought.
Chicago winters can be rough and as someone who suffers from eczema, I definitely have to pay a little extra attention to my skin during the colder months. Dry itchy skin is no fun especially when it's cold out, so starting my moisturizing process in the shower is key! I squeeze a quarter size amount onto my body sponge and work it in until it forms into a rich lather, then apply and rinse. After showering, my skin looks and feels fantastic even before applying my daily moisturizer – that is, if I'm not too lazy to apply it!
Besides its amazing lather, the thing I love most about this body wash is that it's made with shea butter. Shea butter not only helps to provide intense moisture, but it also turns the shower experience into a more luxurious one. Shea butter is my go-to after shower moisturizer during the winter, and to have it as one of the main ingredients in my body wash is such a game changer for my body care routine! My skin is definitely thanking me for it.
The Olay Moisture Ribbons Plus body wash comes in two luxurious scents: Manuka Honey, and Lavender Oil. Choose one and join the #WinterSkinChallenge with me to make sure your skin stays hydrated all season long!
x Alicia
Follow
This is a sponsored conversation written by me on behalf of Olay. The opinions and text are all mine.
Follow
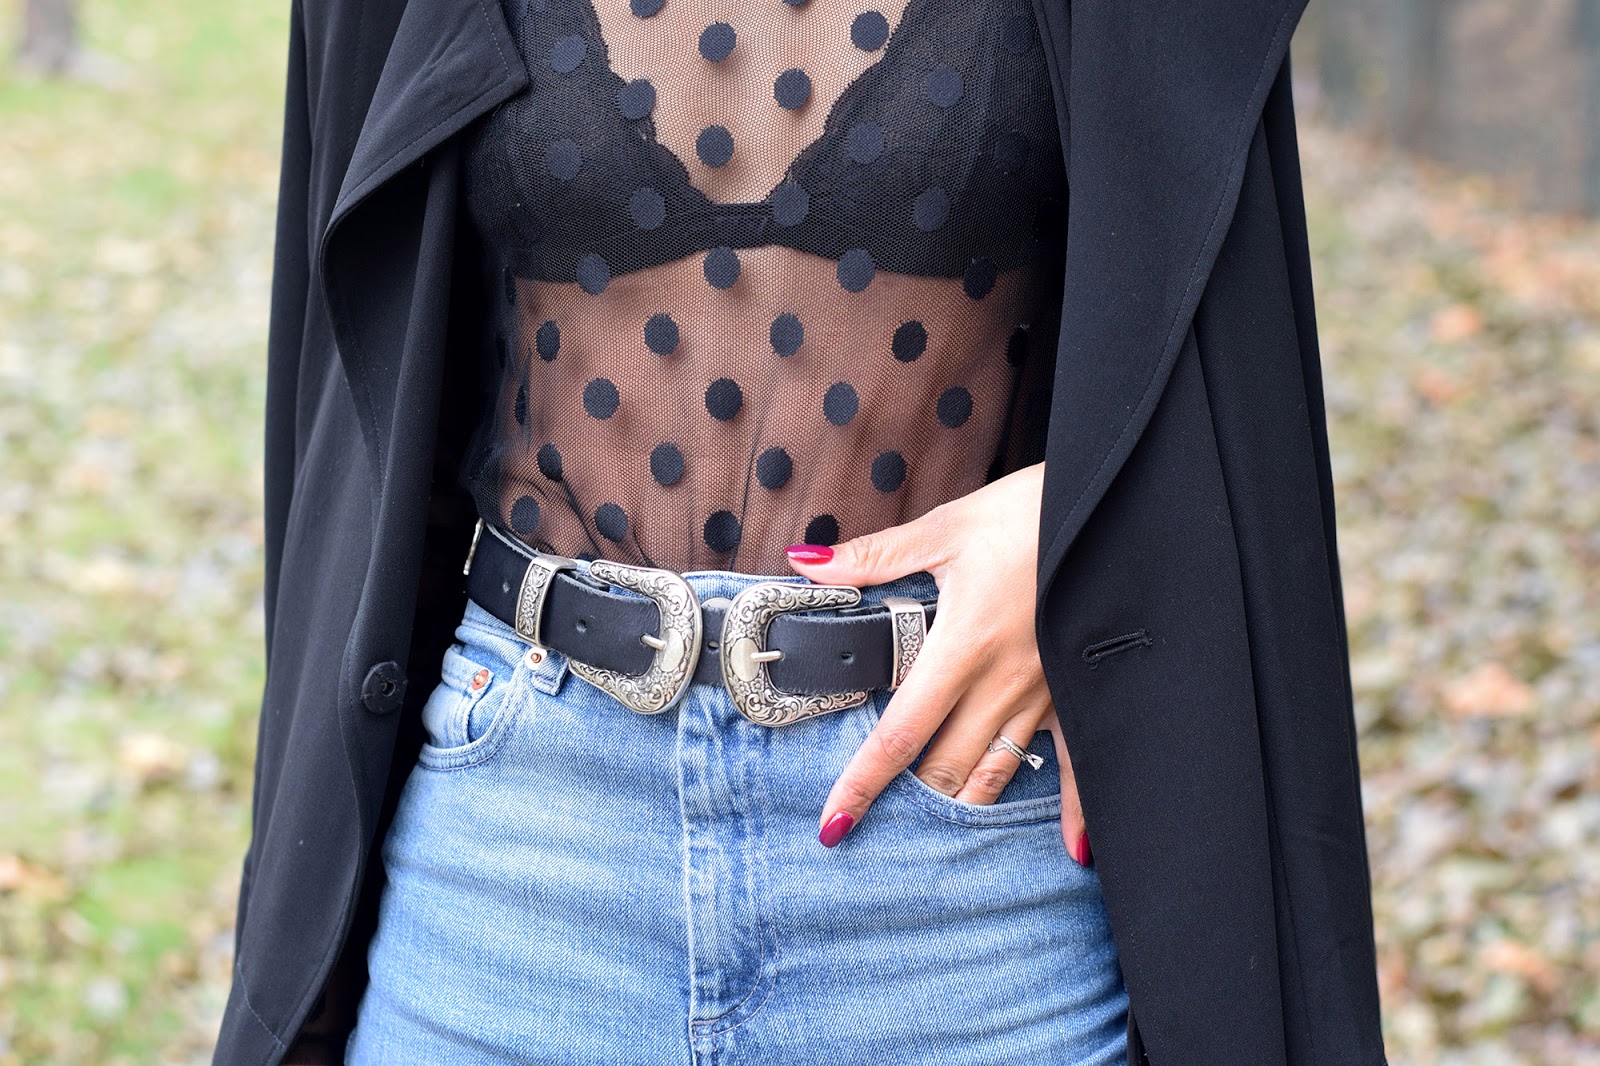
Dots


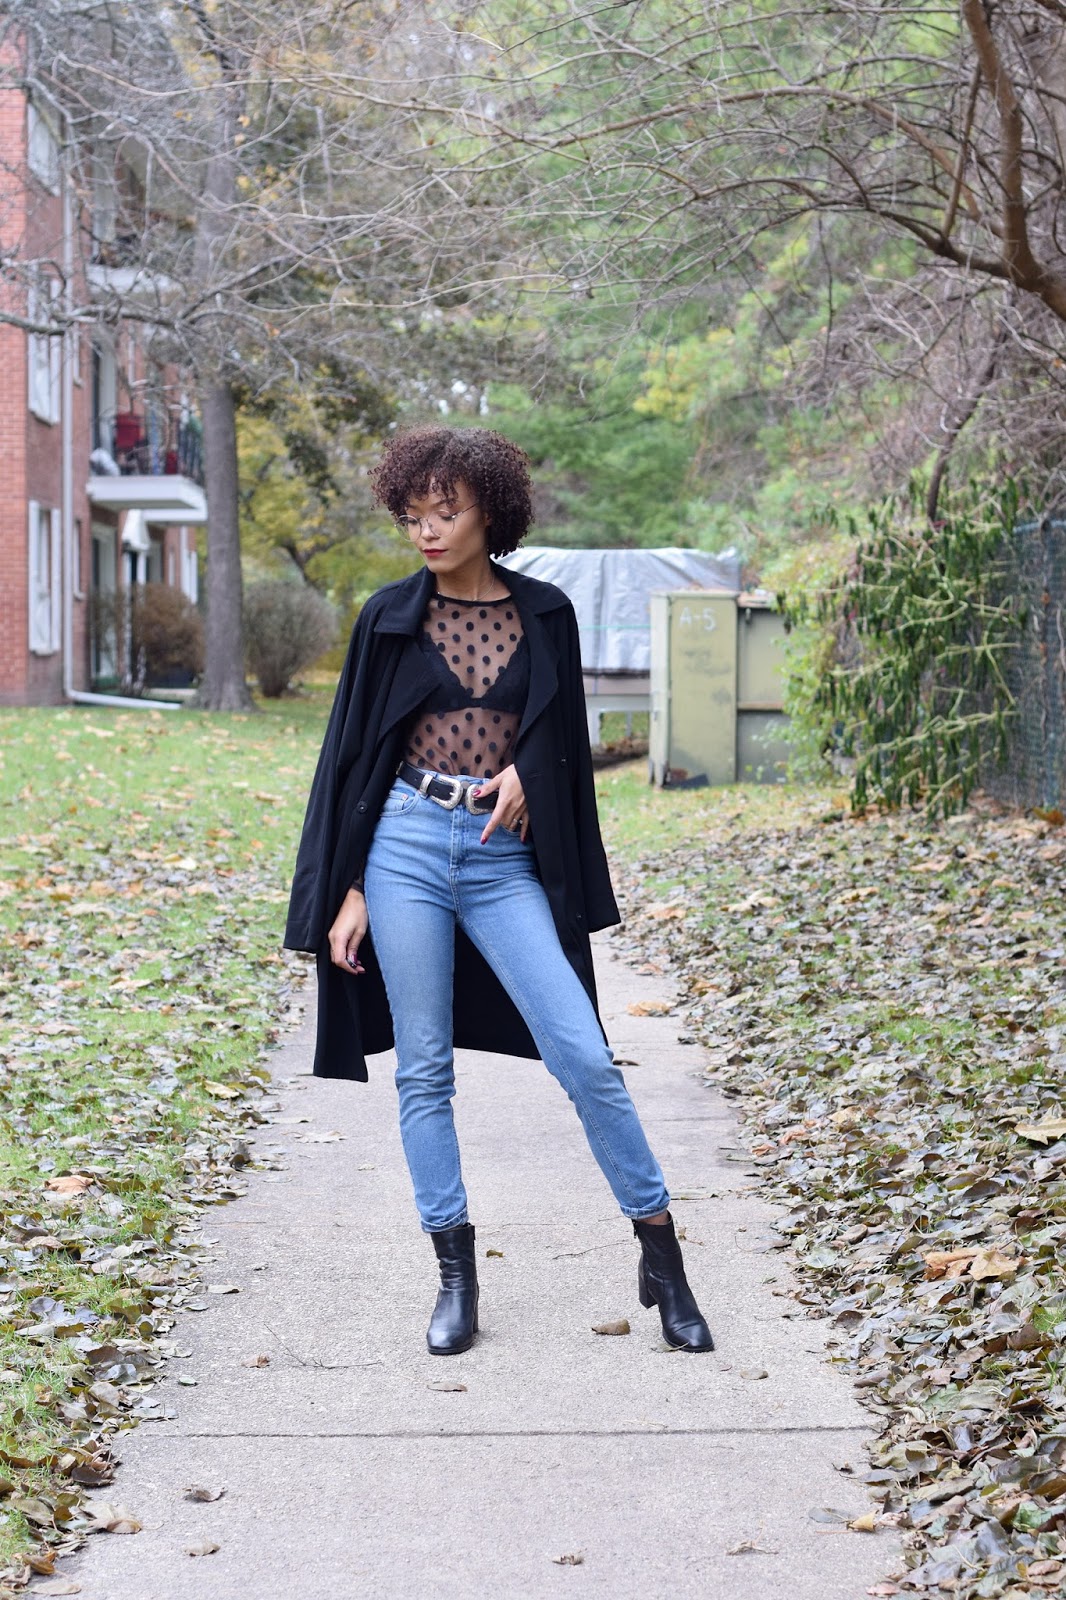 |
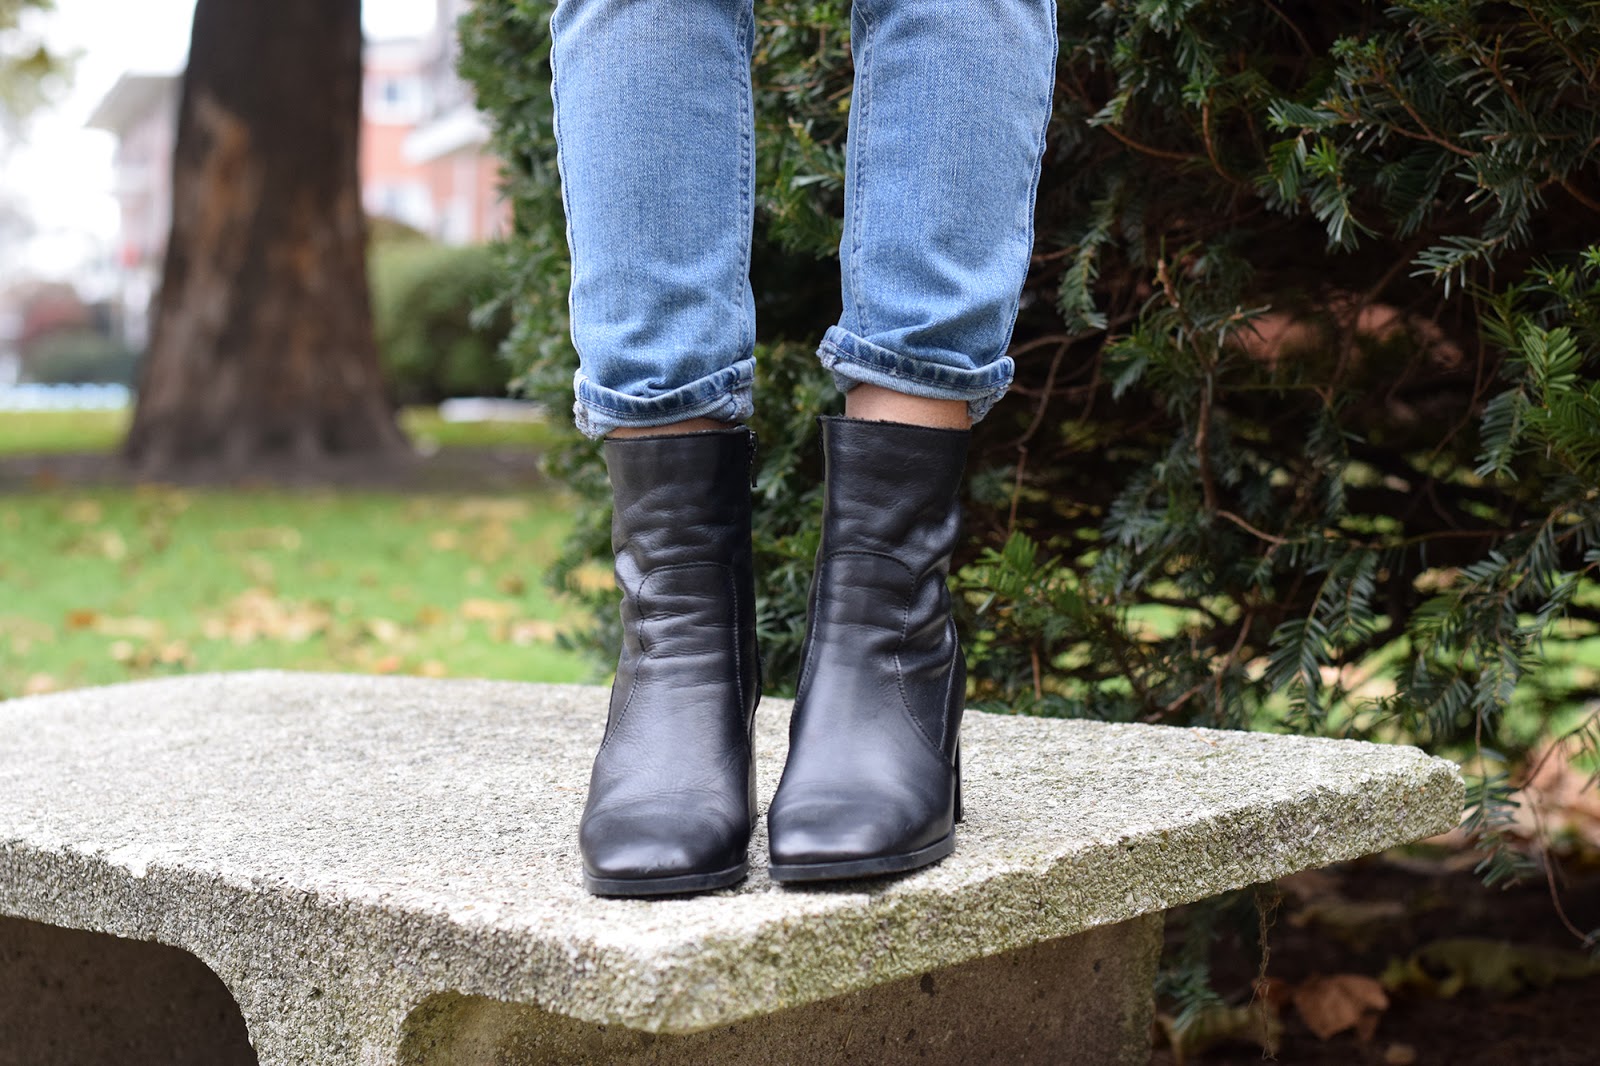
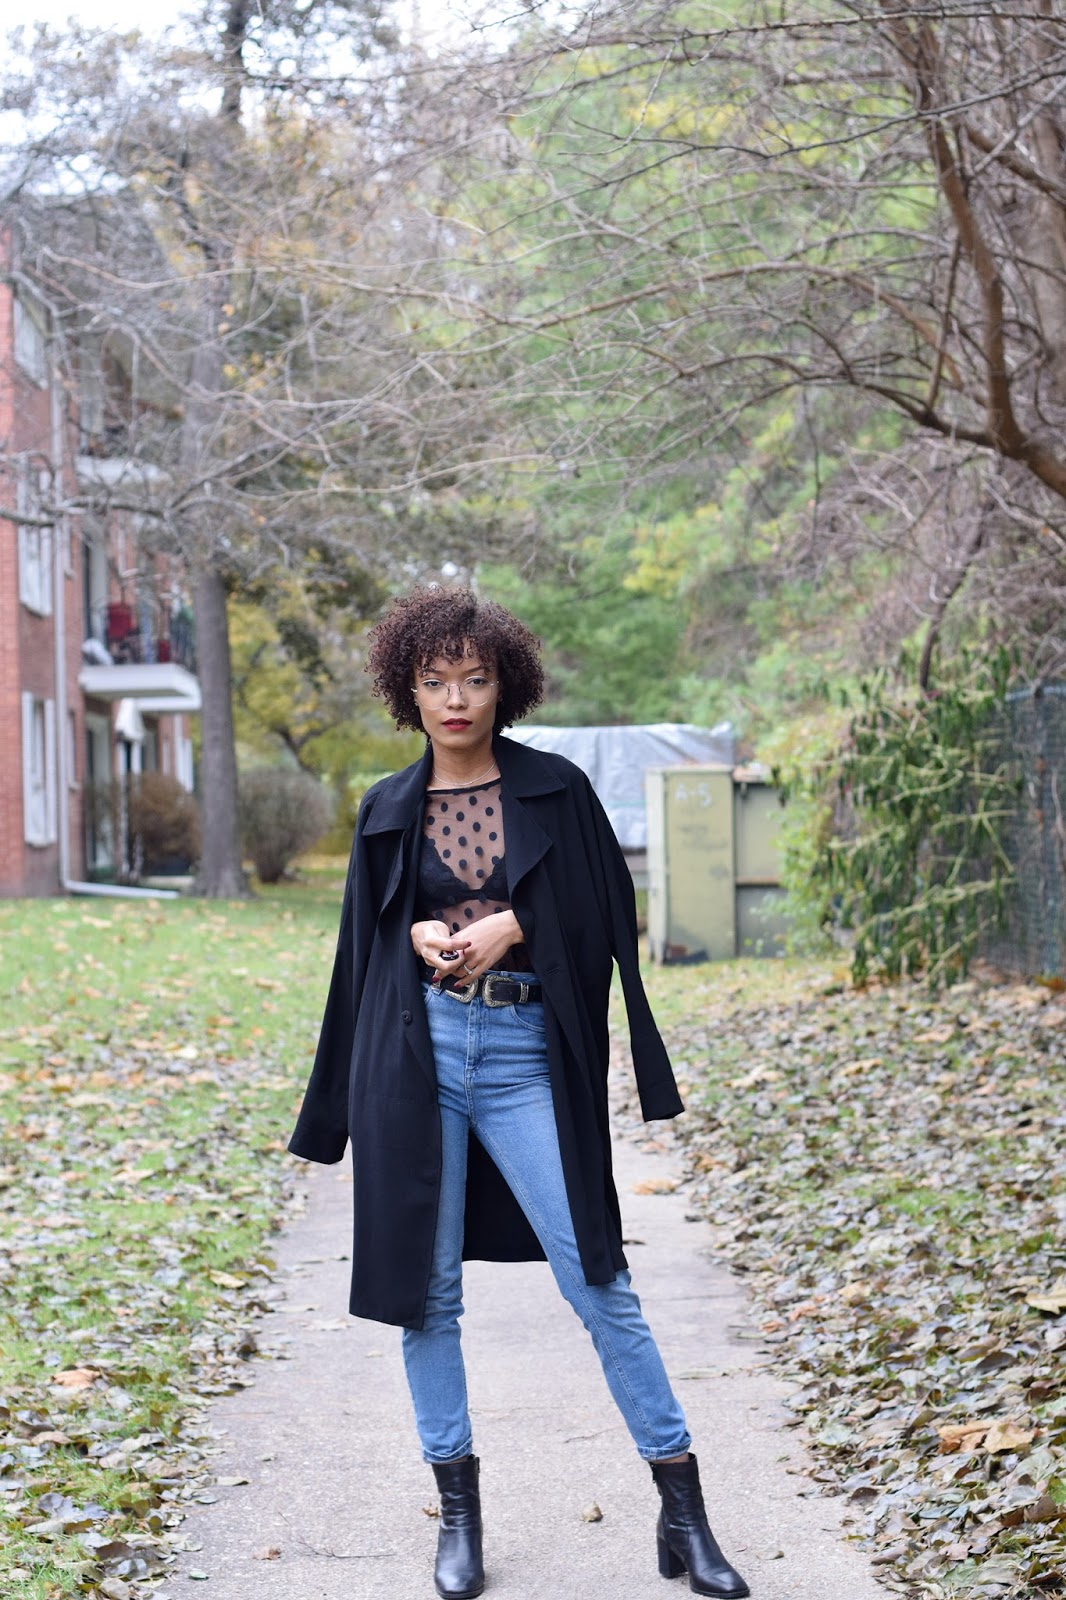
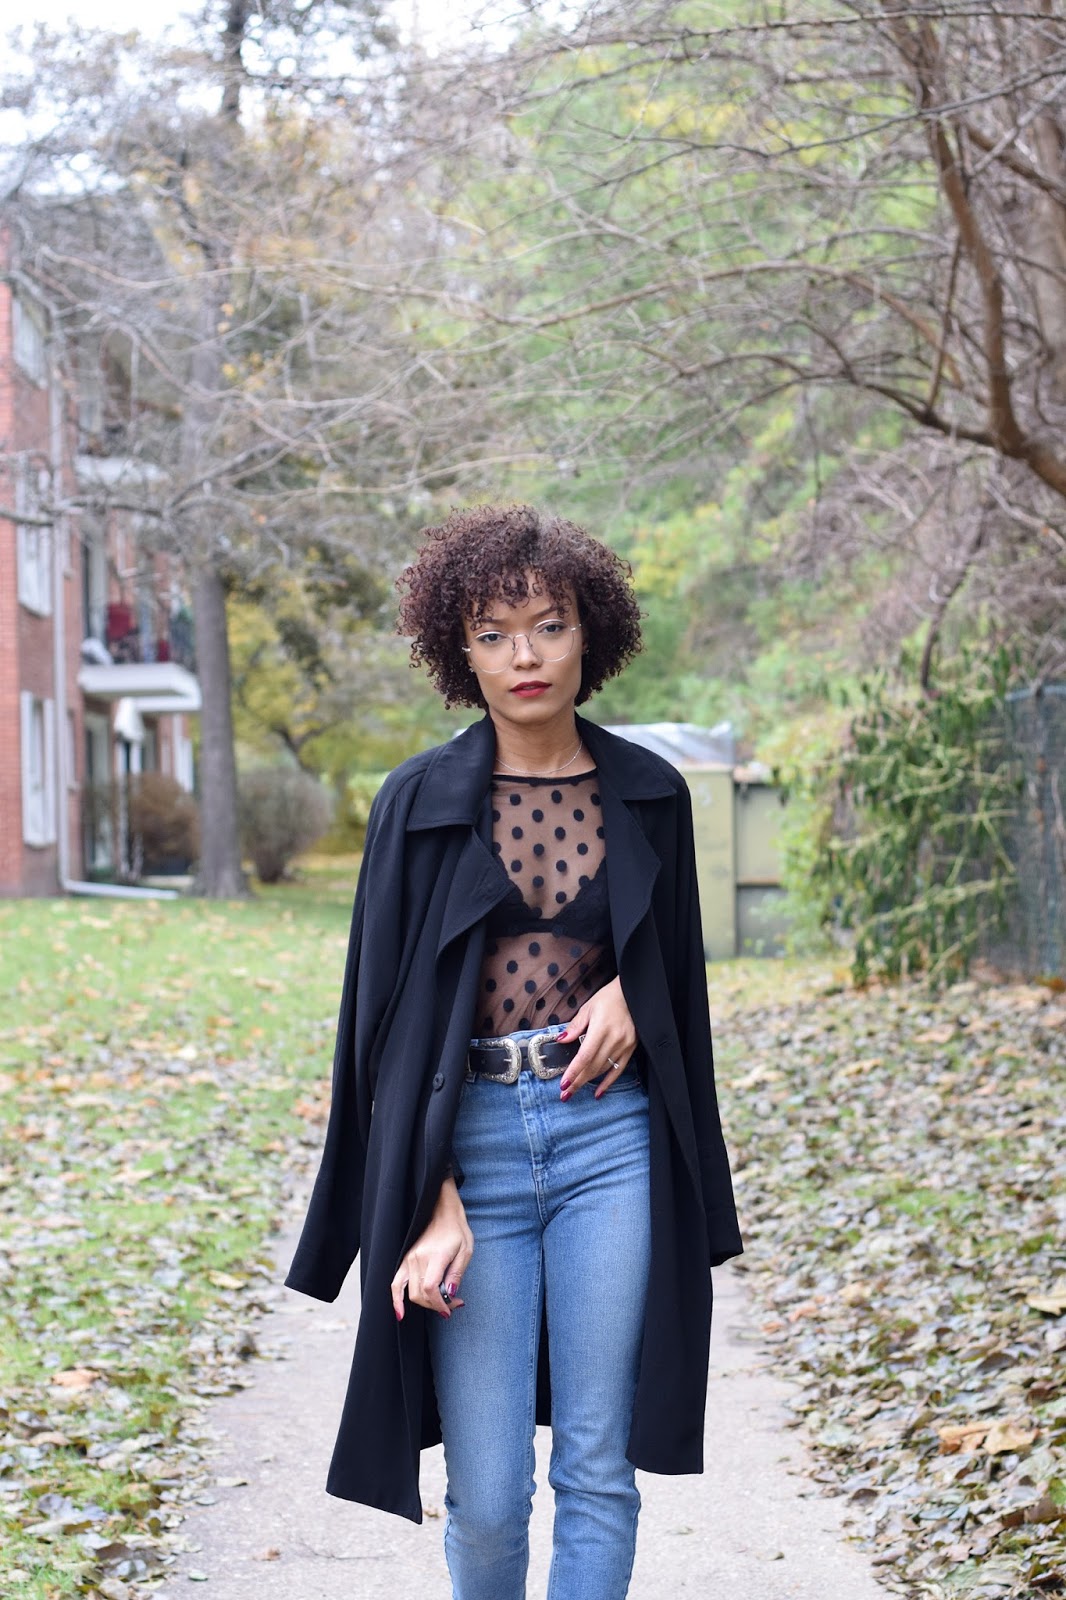
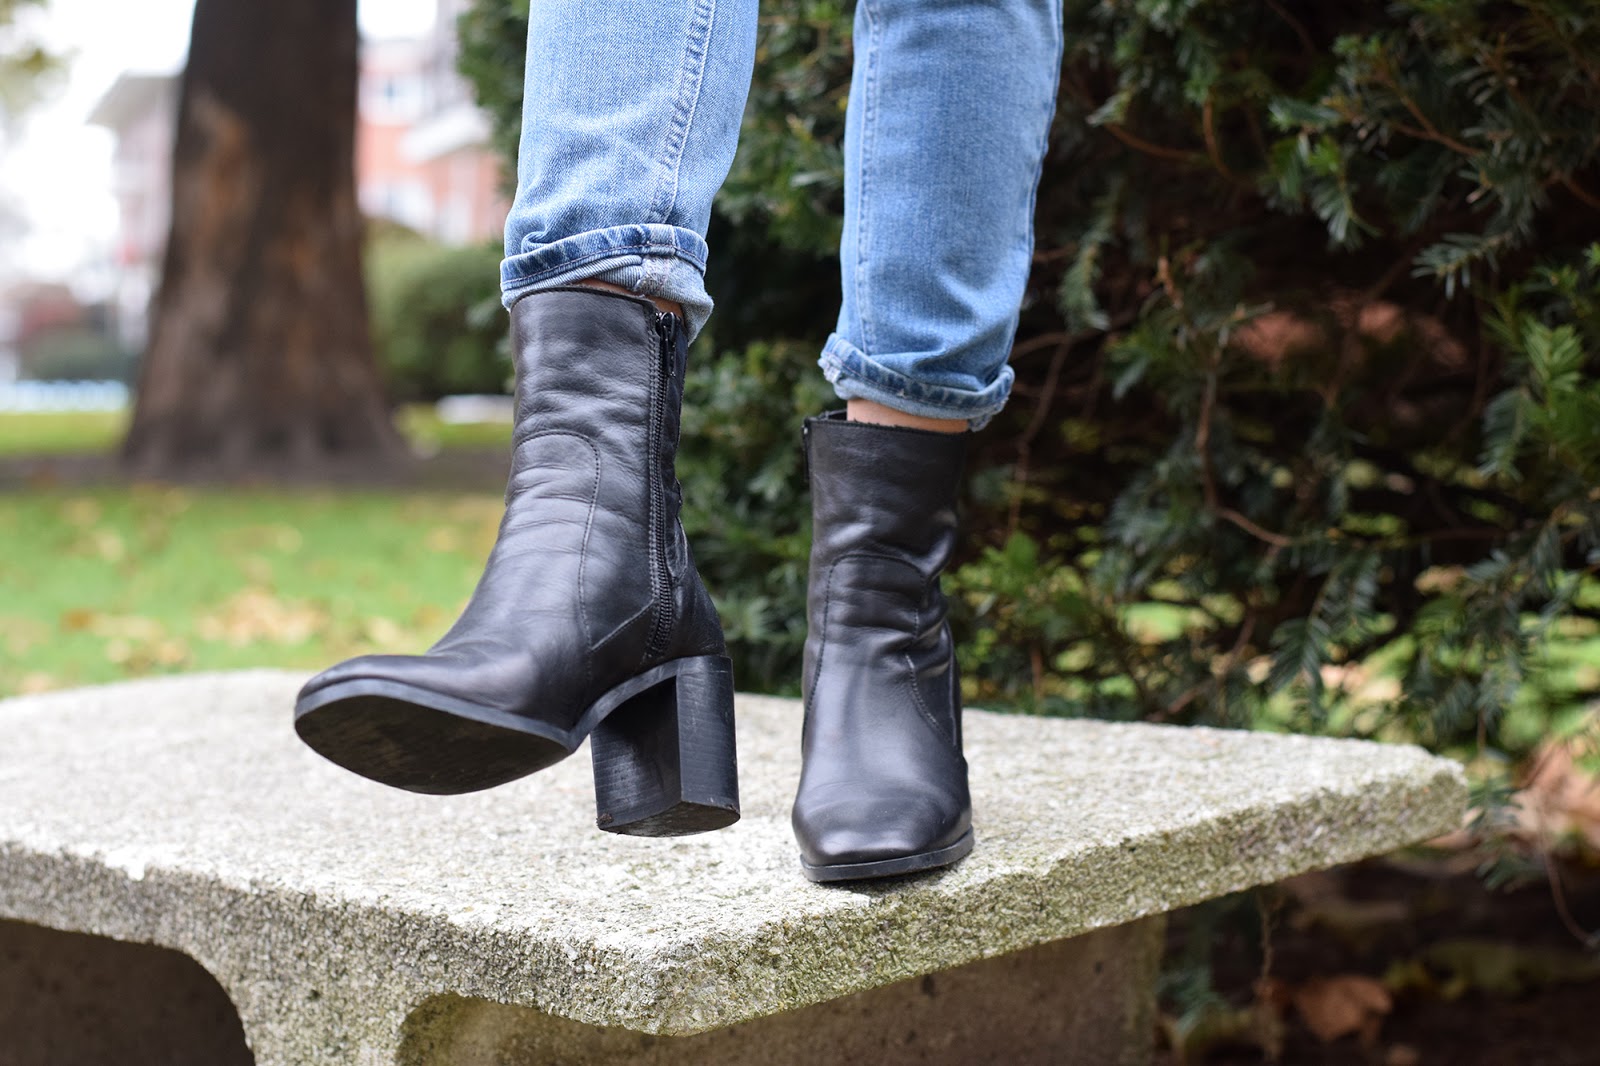
| Top - Zara | Bralette - UO | Jeans - ASOS | Belt - ASOS | Necklace - Twelve Oh Six | Shoes - Zara | Glasses - Firmoo |
This is one of my favorite outfit posts I've done in a while. I've been loving the mesh top trend lately and I finally caved an picked up my own top to style. I opted for something super basic that can be worn as is, or under a slip dress (y'all know how much I love slip dresses!).
This time, I took a more lax approach to the outfit and styled the top pretty casually. This is something I'd wear on a quick shopping trip, or a lunch outing. Surprisingly it's still nice enough in Chicago to wear this top outside without getting frostbite! I don't know what's up with the weather (it literally snowed multiple times last month) but hey, I'm not complaining.
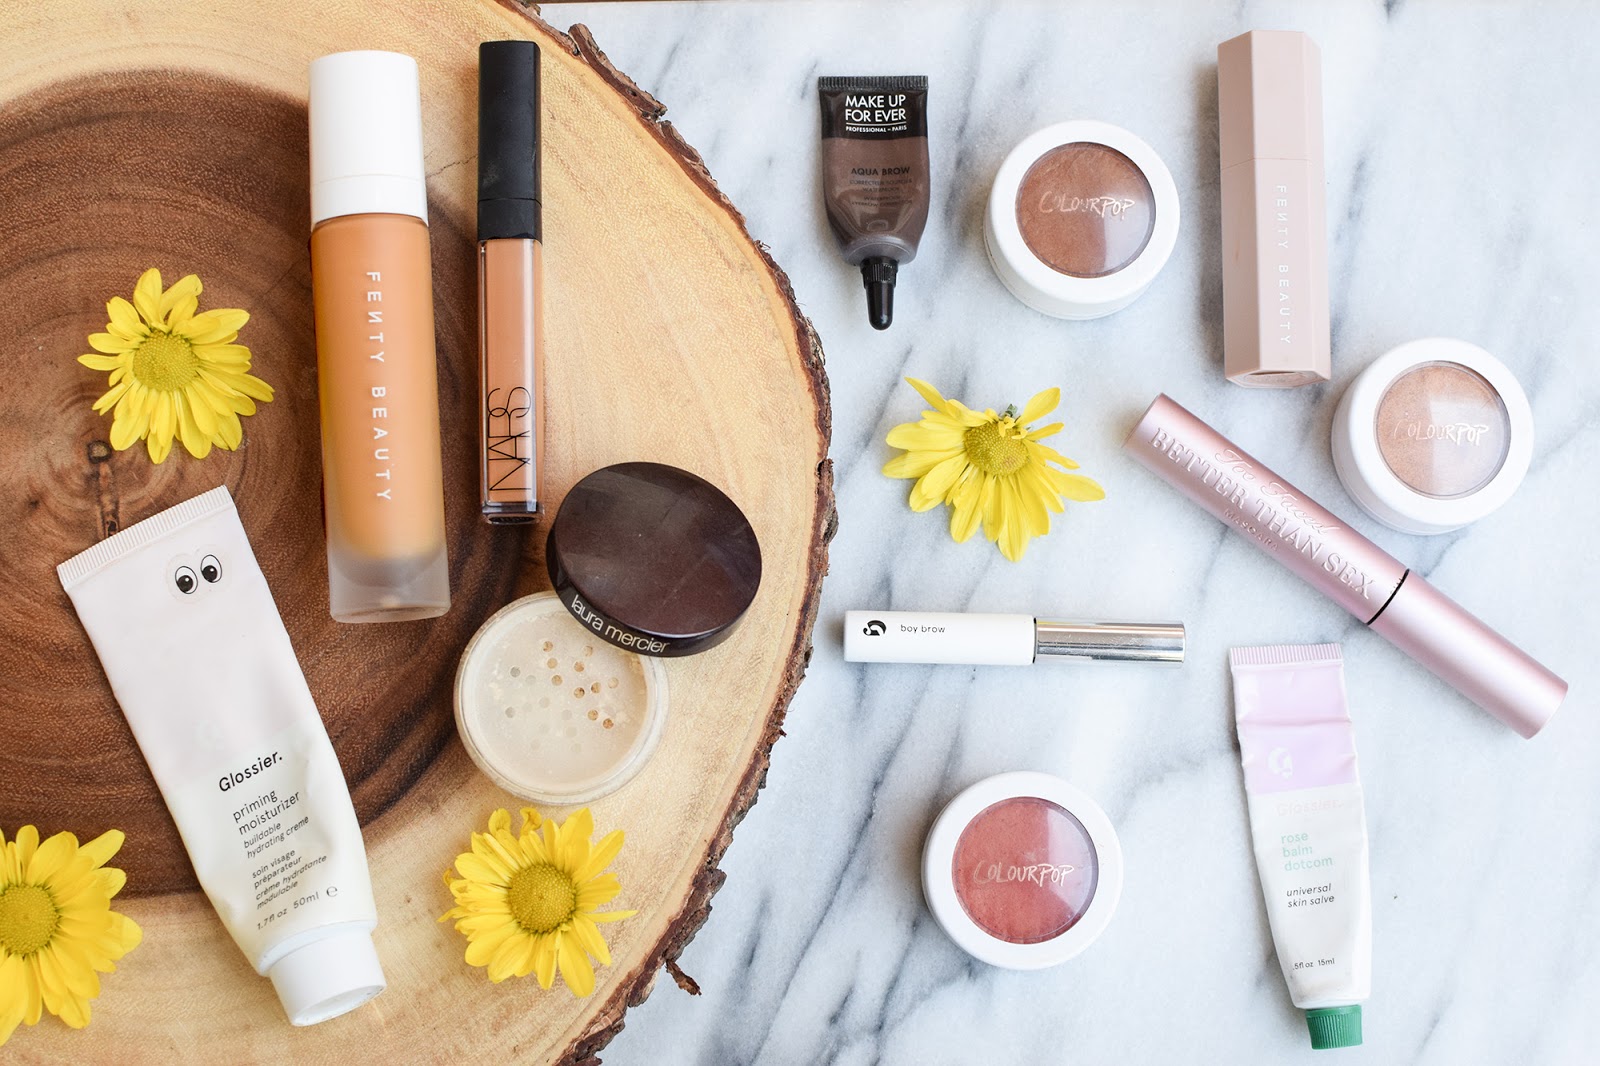
Makeup for Beginners: The Tools
Today, we're picking up where we left off from this post and talking about the starter tools to have in your first makeup collection. Let's begin, shall we?
 Here is our lovely little overview of the starter tools. As you can see we've got tools for complexion products, eyes, and the extras (like, blush and bronzer).
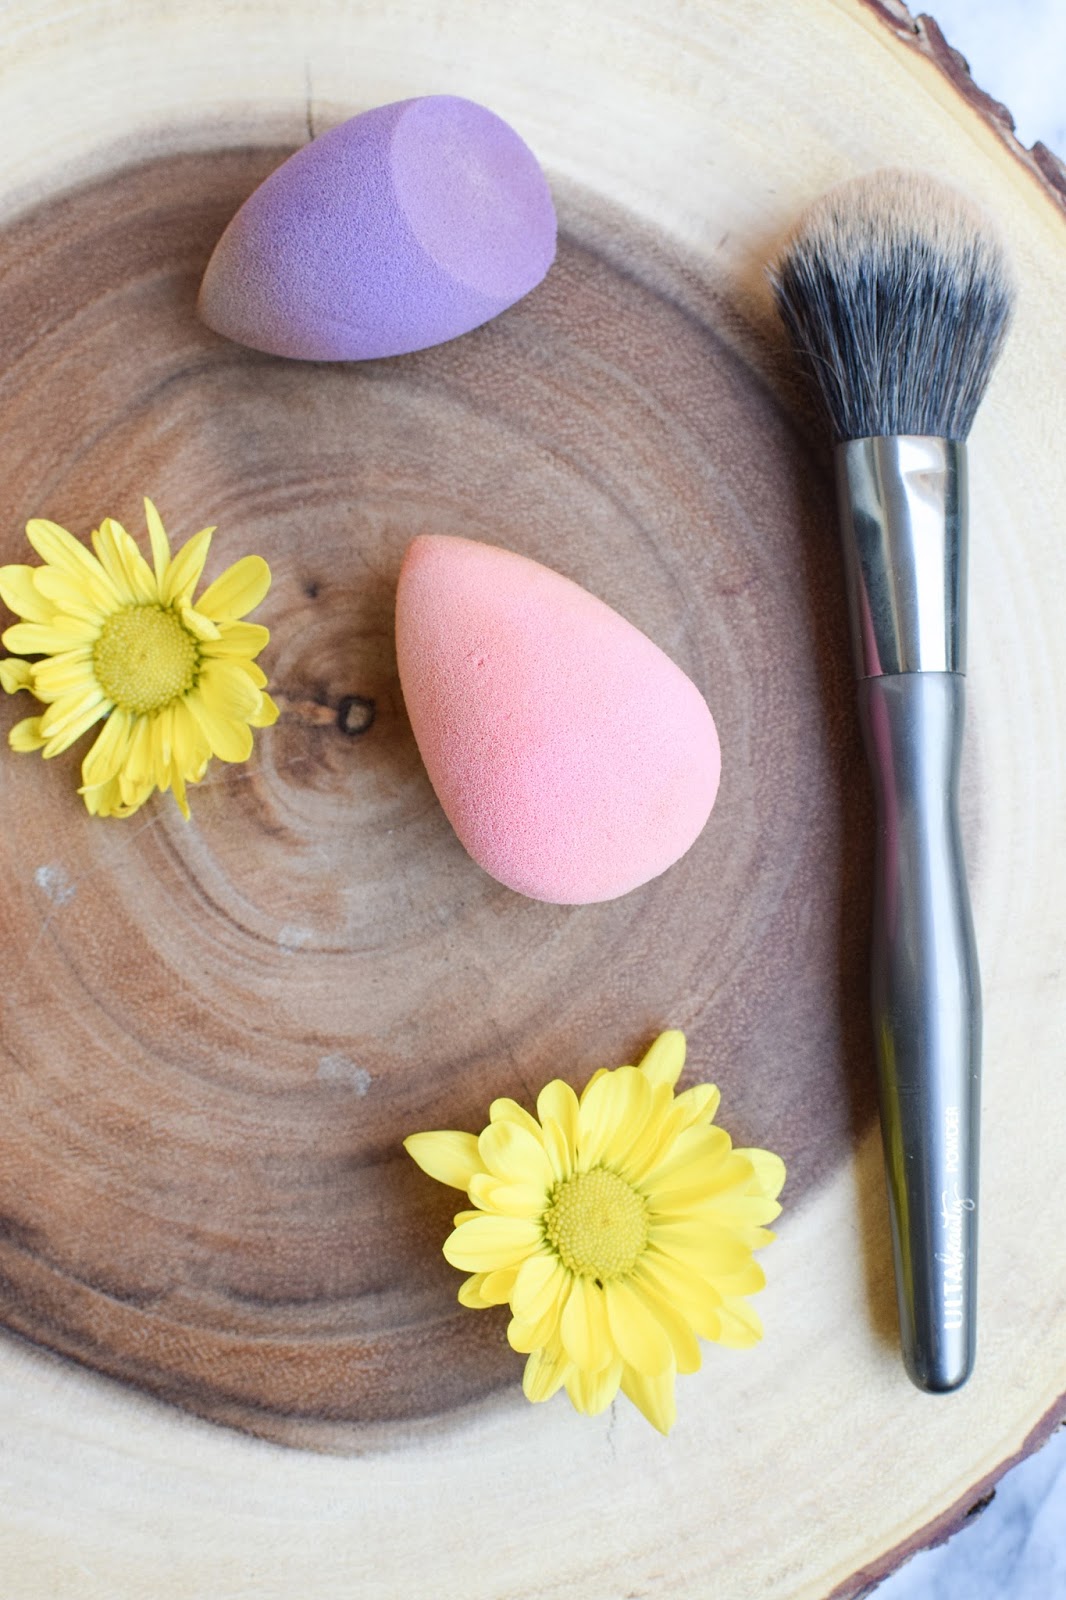
Starting out with your base, you need tools for the complexion products you would have chosen since the last post. If you recall, our base products included primer, foundation, concealer, and translucent powder. Primer is easily applied with your fingertips, so that tool is free! To apply foundation, you'll need some kind of tool to make everything blend seamlessly. I prefer to use a beauty sponge - it's super quick and easy to apply most of my preferred foundations with this type of application. My favorites are the beauty blender, and more recently, the Tarte sponge! I love the flat side of the Tarte sponge because it can also blend out under eye concealer like a dream. When it comes to powder, you'll definitely need a brush. Since you're a beginner, you're not ready for baking just yet so a small amount of translucent powder dusted across your face with a fluffy brush will be your best bet.

Next up, we've got the trusty eyebrow brush. I like this one because it's double ended - two tools in one! The brush on this guy is super soft making it easy to control how much product is going onto your brows. Start soft, then build it up. I've got a bunch of eyebrow tutorials on my YouTube channel, so click here to check out that playlist!
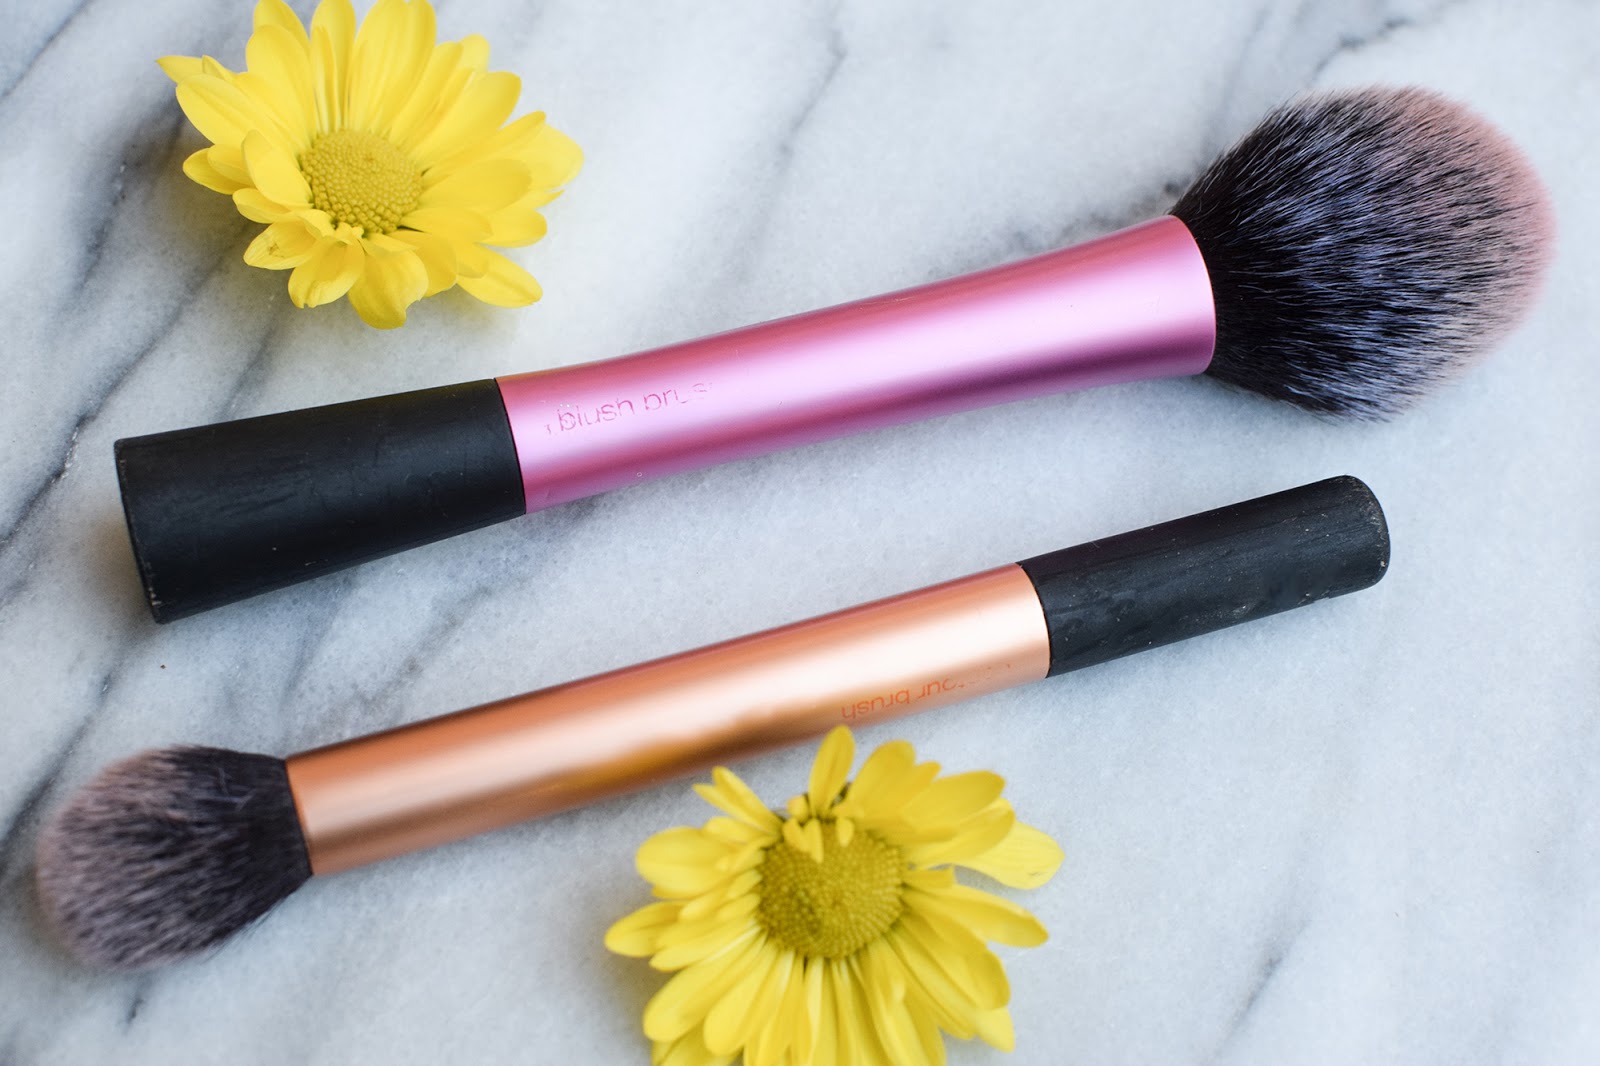
Now it's time to add the color back into your face, and these guys are great tools to do that! I like to use a fluffy tapered brush to apply my blush. It's super easy to apply just the right amount of product with this type of brush since the brush hairs aren't super dense. As for bronzer, I usually do more of a focused contour/bronzer application so I use this smaller, more dense brush. This brush gets right into the hollows of my cheeks, and is small enough to add a light nose contour!

Next up, we've got our highlighting brushes. Personally, the tools I use for highlighting changes day to day. Sometimes I prefer to use my beauty blender to apply a highlight, other days a brush, and sometimes I use my fingers instead. If you want to keep your fingers clean and get a more intense highlight, a narrow brush is the way to go. You can apply the highlighter in exactly the spot you want it, and use the same brush to soften it up. I use the smaller brush pictured to apply highlighter to my nose and my brow bone - all of the places that are too small for a large brush to get to.

Finally, we've got our basic shadow brushes. For a beginner's kit, the main ones you'll need are an all-over lid brush, and a blending brush. Usually beginners aren't going to be too experimental with their eyeshadow looks, so these two basic brushes are just enough!
What other tools do you think beginner's might need in their arsenals? Let me know!
x Alicia
A Pop of Color


Sometimes, all I want to do is scroll through a couple of photos for some outfit inspiration. That's what today's post is all about. Light on the words, heavy on the imagery.
x Alicia
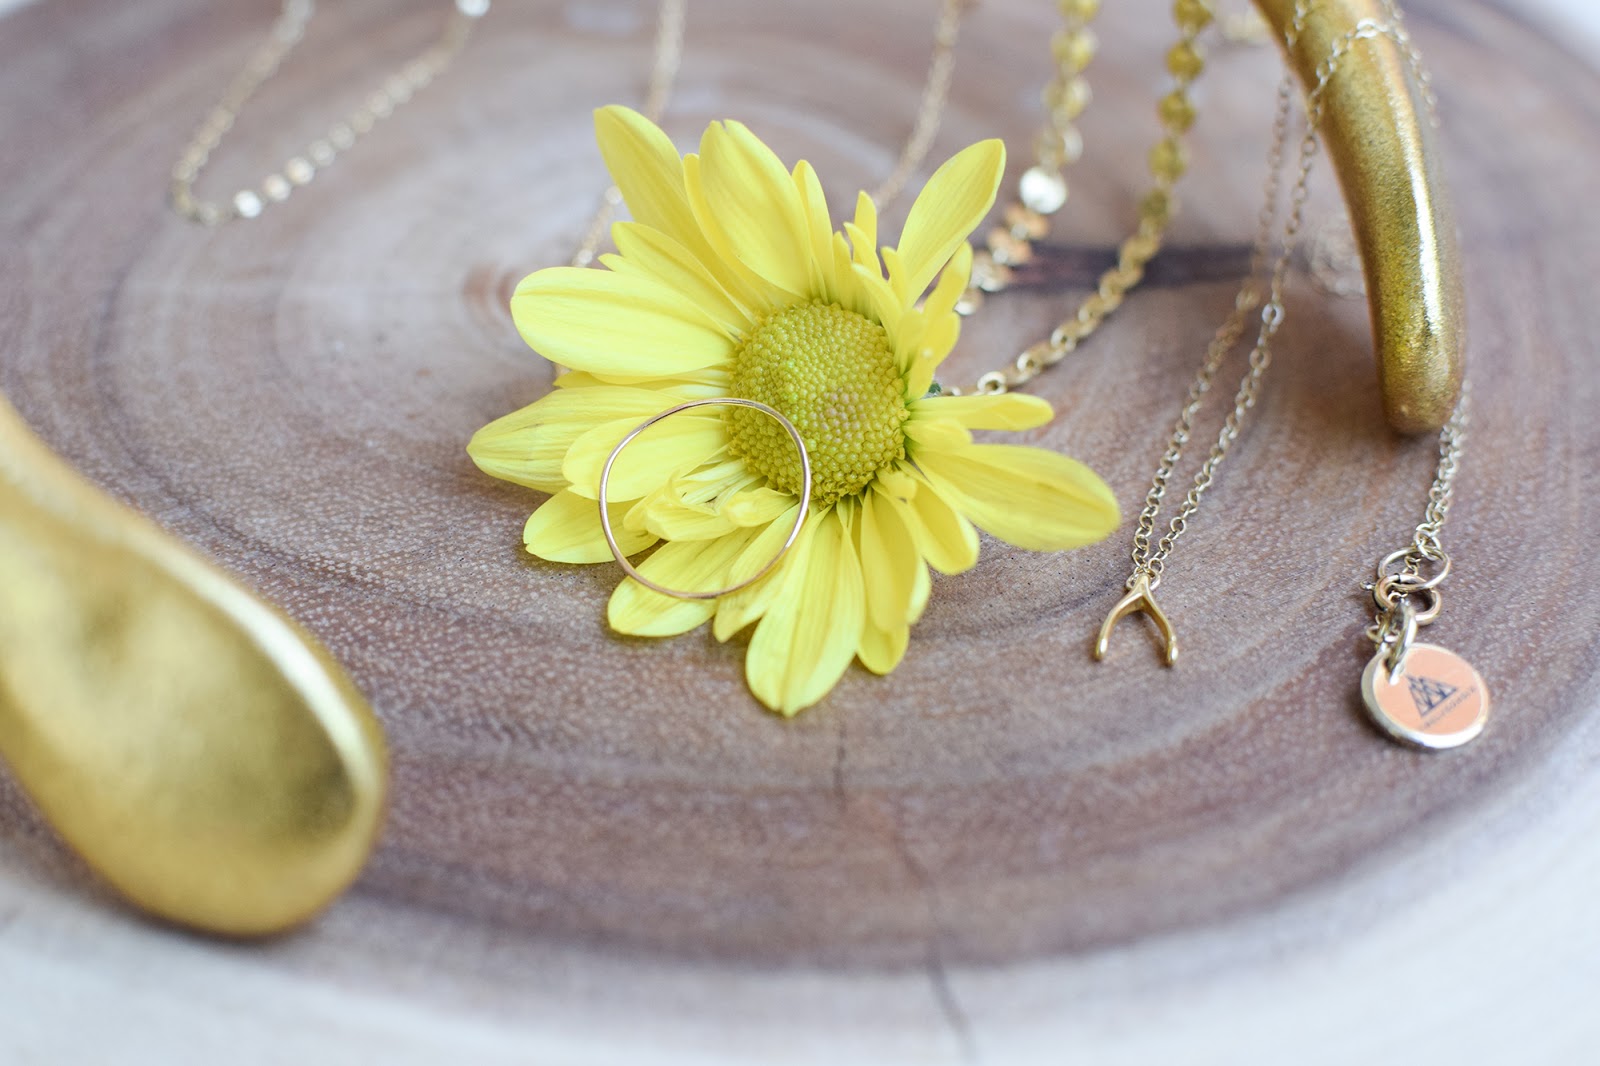
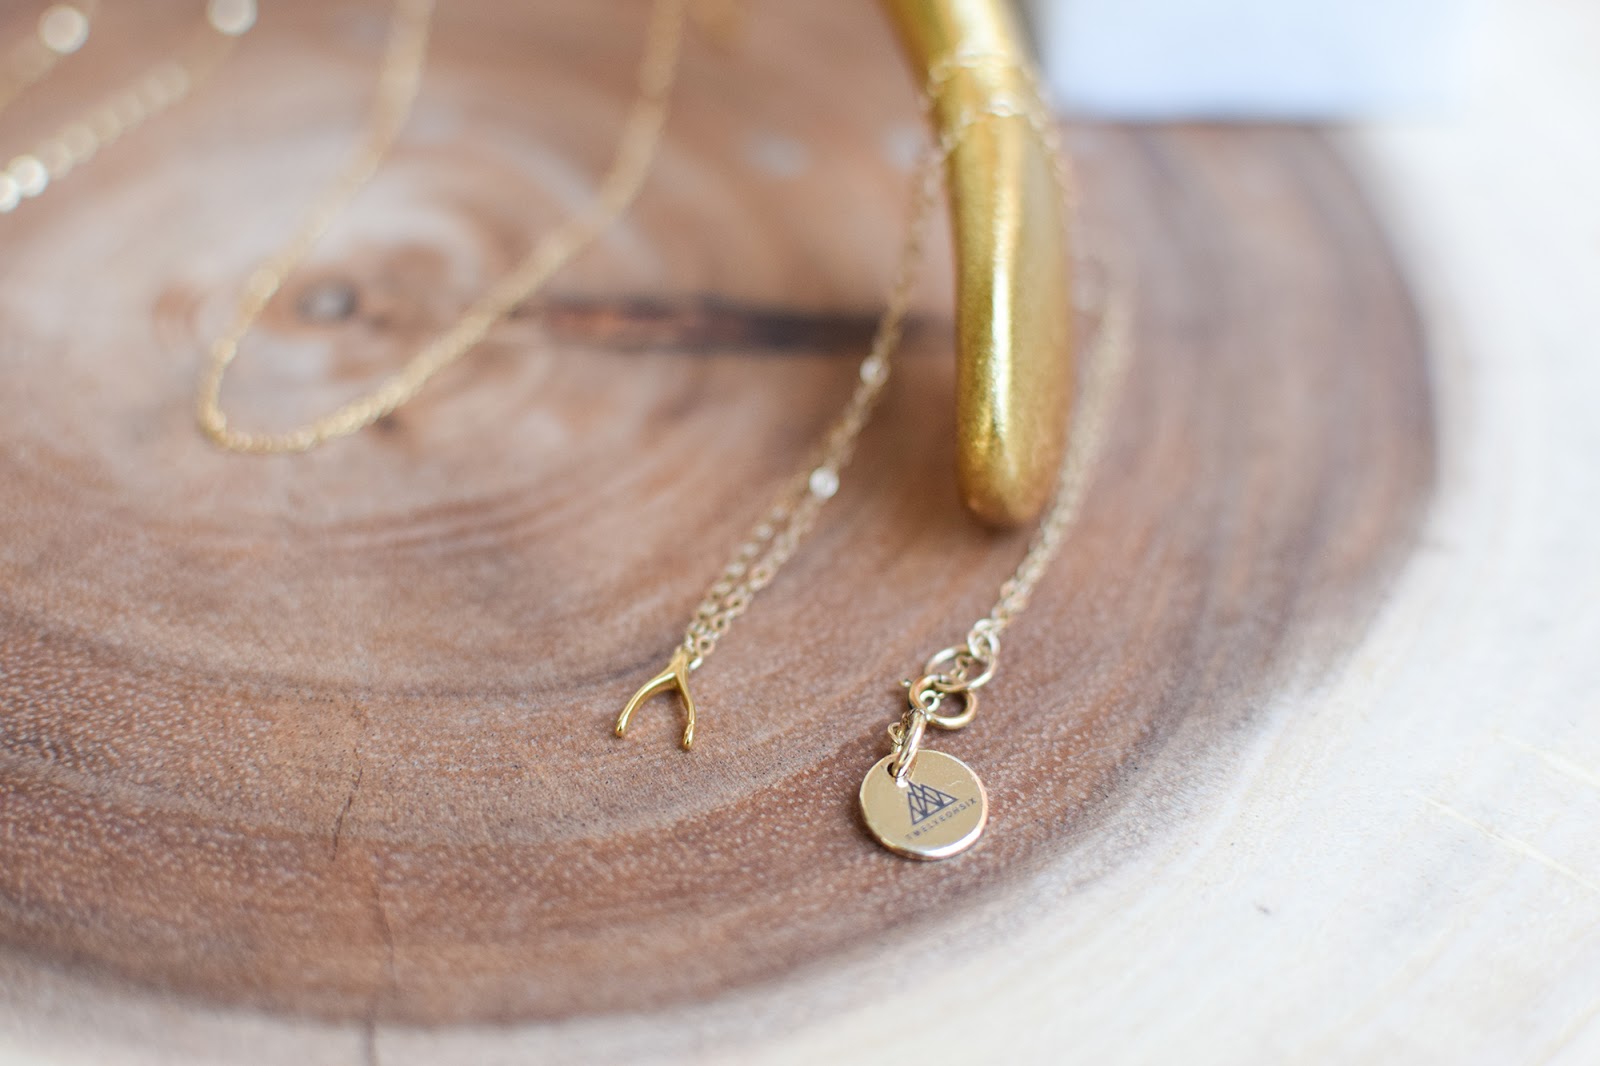
Everyday Jewelry
 |
| Zuri | Braden | Lark | Olivia (Pictured Left to Right) |
Fenty Beauty Review


Makeup for Beginners: The Face
Okay so I thought I'd get back to basics and make a little kit on my makeup essentials. These are the things I find most important in my makeup routine, and the items that should be in every beauty fan's arsenal.
An overview of all of the products that you need: primer, foundation, concealer, powder, eyebrow products, blush, bronzer, highlighter, mascara, and lip balm. That's not too much, right? Let's get a bit more in depth with this.
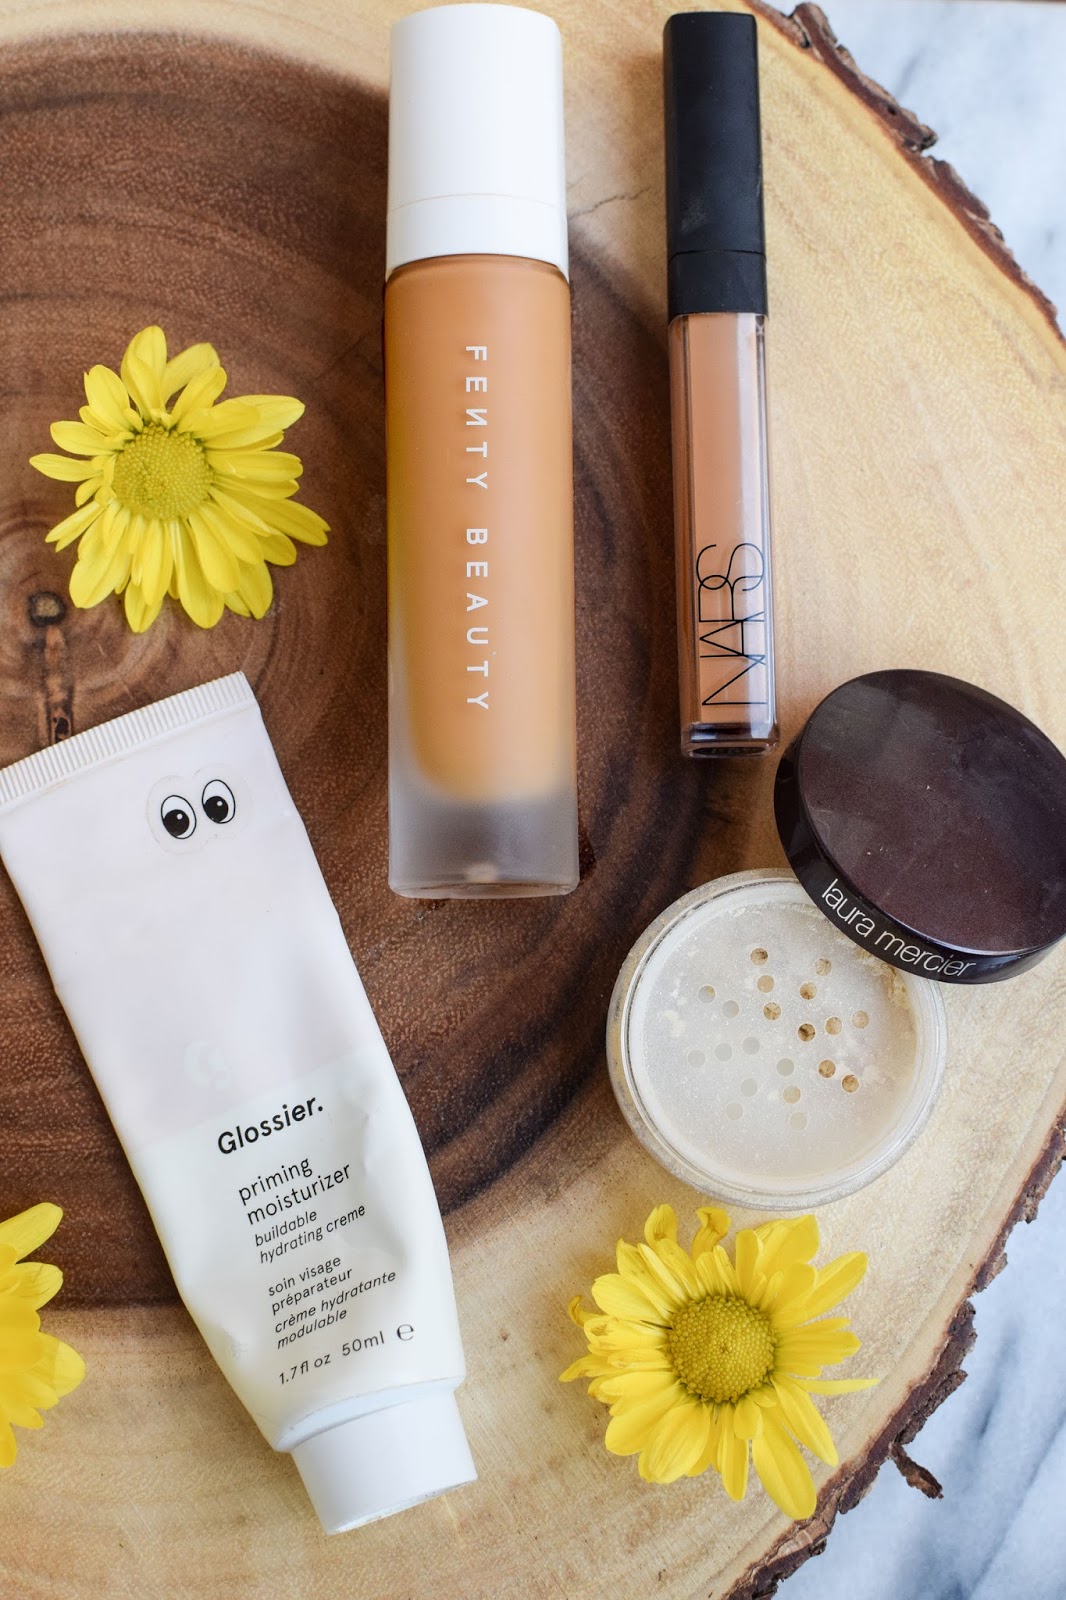
Let's start out with the base. This is basically the most important part of your makeup routine. It's what gives you the look of smooth, perfect skin. We all know by now that I'm not a fan of primers, but I love a priming moisturizer. This offers a nice base for the foundation to stick to while providing your skin with hydration and moisture so that it doesn't dry out (like traditional primers). Next, you want to make sure to have a foundation that is a perfect color match. Skin tones change depending on what season you're in or depending how much or little sun you're getting. Make sure your foundation matches your undertones, and if you're getting shade matched in a store take a step outside into natural lighting to get a better look. The same concept applies for concealer! For a basic kit you'll want to find a concealer that matches your skin tone. Don't try to go for the lighter or darker ones that would be used for contouring because that isn't a beginner concept. Start small. To complete your base you'll want a nice setting powder. I like to use my Laura Mercier Translucent Setting Powder and I use it to set my t-zone since that's where I usually get oily. A little goes a long way with this powder, and there's no need to "bake" when you're doing a natural look!
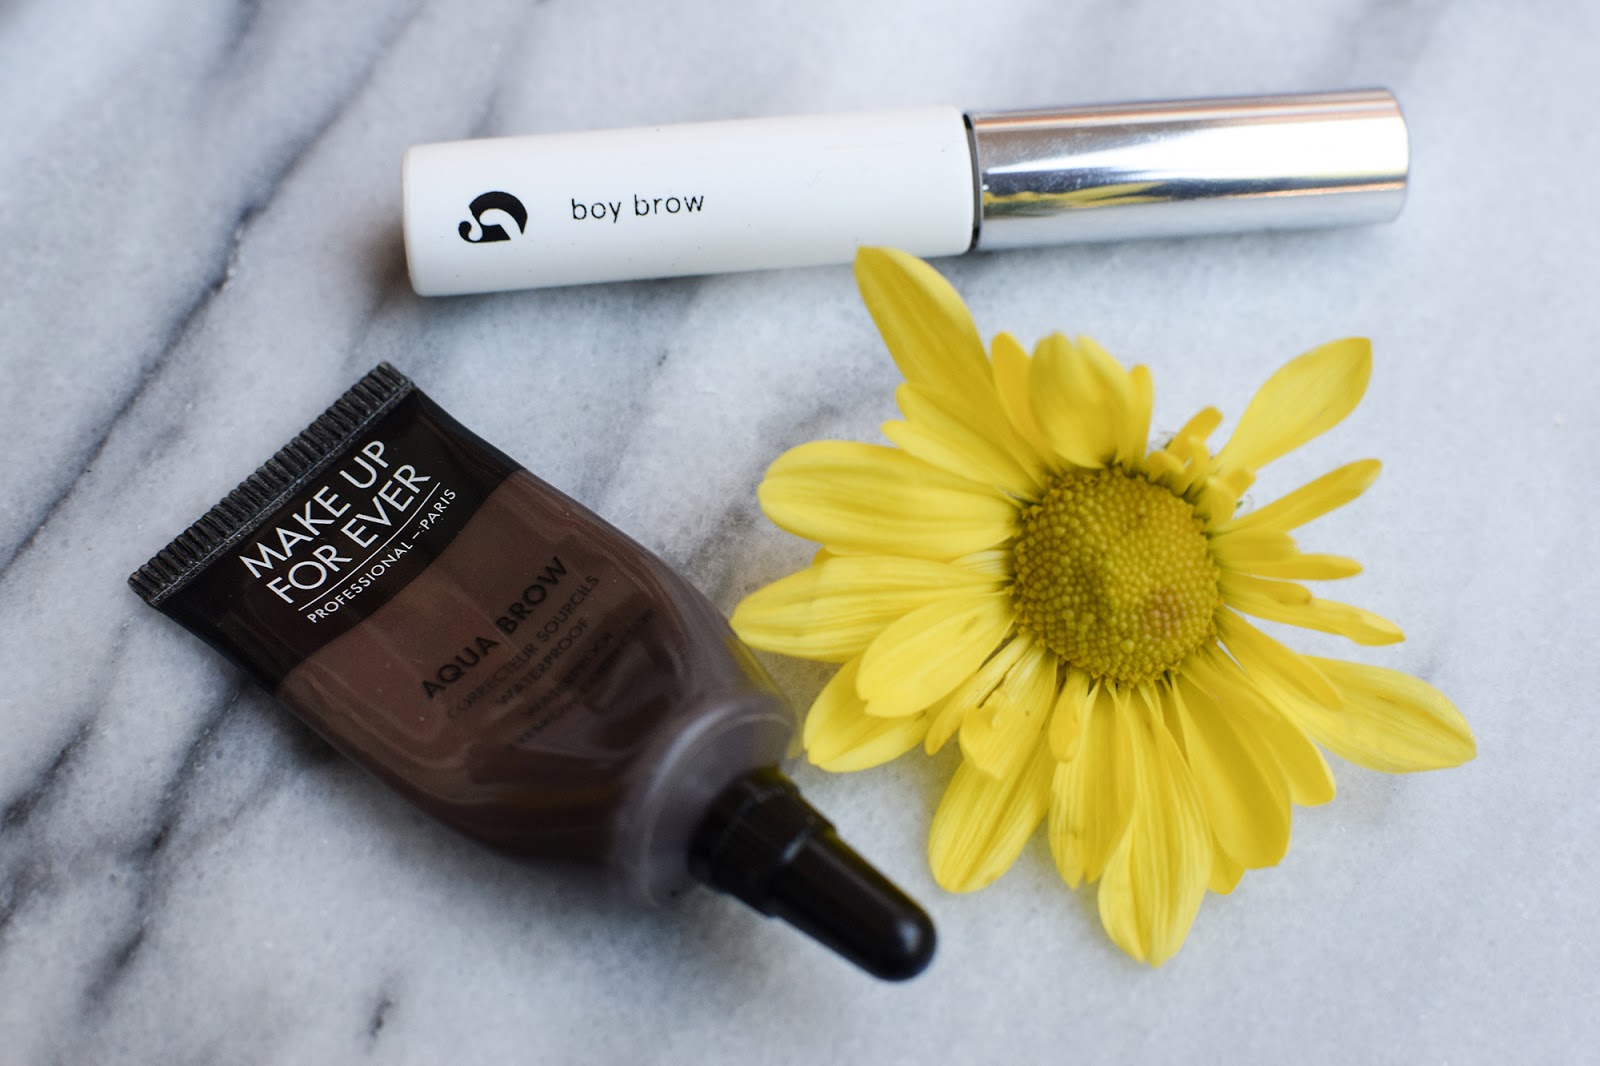
So, moving on to my favorite part of a makeup routine - eyebrows. I don't leave my house without brow product on. Eyebrows frame your face, and IMO it's super necessary to fill them in. On chill days I'll opt for using Glossier's Boy Brow on it's own, but on days when I want a strong brow I'll use Makeup For Ever's Aqua Brow. Sometimes when I'm feeling extra fancy I'll use both!

This next part of the makeup routine is where you add some color back into your face. Applying bronzer, blush, and highlighter gives your face some dimension and can make you look super refreshed and alive! I like to apply bronzer to the hollows of my cheeks, along my jawline, forehead, sides of my nose, and as a lid color on my eyes. This gives me a nice sun kissed look and adds depth to my face. Next, I'll apply highlighter on my cheekbones, center of my nose, brow bones, and inner corners of my eyes. I'll finish off this part of the face by applying blush to the apples of my cheeks for a nice rosy look.
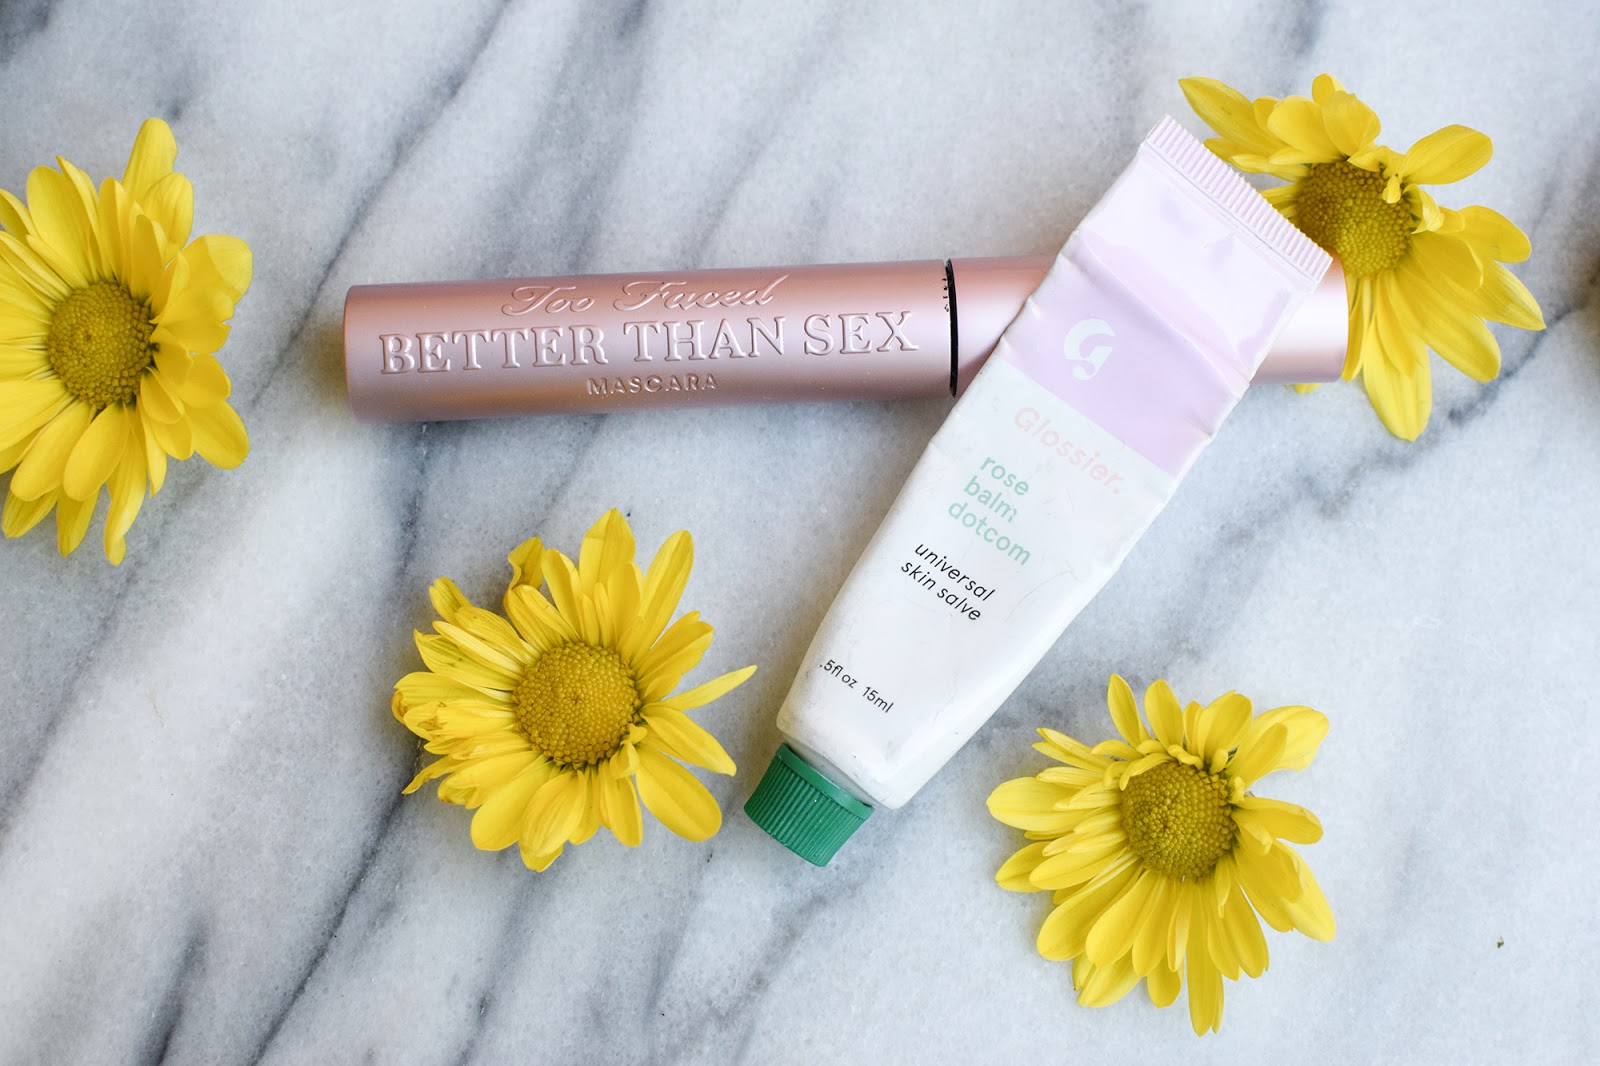
The last step in the routine is what I like to call the "finishers". These add the final touch and pull the whole look together. Mascara darkens and lengthens your lashes to make your eyes appear more awake, and lip balm gives you hydrated and plump lips. I like to use a lip balm that has a hint of color in it, like this Balm Dotcom.
Subscribe to:
Posts (Atom)


